Showing posts with label quick crochet. Show all posts

Thursday, August 08, 2013

Easy Peasy Moebius, Getting older, Learning New Stuff

I have been trying my darndest to get into my blog and the rules have changed and so I have to learn something new.....slowly but surely.  I am getting on in years...I admit it.  I finally gave in and bought a "cane seat" so that when I am walking -- and I do walk every day -- and things start hurting, I can whip out that little seat and sit down.  Before I was just stopping where I was until I could go on but I was afraid the neighbors would think I had to go to the bathroom or something.  Embarrassment.  whoa.

Anyway, I created this easy peasy moebius as a quick gift for elderly women who have no family so that RSVP can give it to them at Christmas.  I have made 2 of them.  No one has tested the pattern, but I do have 2 friends who are going to give it a try.  I sure hope you can use this pattern. I love sharing.  Linda


Easy Peasy Moebius 

by Linda Graimm


Worsted Weight yarn  (I used Caron Simply Soft in Pagoda, I think the color was...something like that)
Size J or K hook....whichever you feel more comfortable with
Gauge:  makes no never mind  Smile

PATTERN:

Leaving a long chain about 12", Chain 127

Single crochet in 4th chain from hook, chain 3.

Row 1:   Skip 2 chains, single crochet in next chain across.  ( you may end up with 1 or 2 extra chains.  Ignore them and work them in later.  You need to have a number of ch 3 spaces across that are divisible by 2 with 1 extra so that you start with a ddcs and end with a ddcs (see next row).

Row 2:   Turn work.  Chain 2, in first chain 3 space place:  (double crochet - ch 1 - double crochet - ch 1 double crochet)  (double double crochet shell = ddcs);   *Skip next ch 3 space and in next chain 3 space, place a ddcs*  across the row, ending with a ddcs.

at this point, you will lie the work down and make one twist in the work and then slip stitch in first dc of row just worked (skipping the chain 2) to connect the row.  Now you will work around in rows and the work will have a twist in it.  You will use the beginning long chain to sew the first row together to make work look neater.

Row 3:   slip stitch into first ch 1 sp in ddcs, ch 1, sc in same space.  *Chain 3, sc in next ch 1 space* across row.   Slip stitch in first sc.

Row 4:   Slip stitch into first ch 3 space.  Ch 2,  place ddcs into same ch 3 space,  *skip next chain 3 space and place ddcs into next ch 3 space* across.  ending slip stitch into first dc of first ddcs.

Repeat Rows 3 and 4 until as wide as you want the moebius (for sure to fit around your head plus 4 rows or 6 rows if you don't like snug things.  Finish off with ROW 3....this leaves a somewhat lacy edging to match beginning.    Weave in ends and let me know how it goes.
emmalemmon47@yahoo.com

Tuesday, April 02, 2013

This is such a warm hat!

Baby's Baker Hat

Worsted wt Yarn (#4.  I used Red Heart Super Saver in blue variegated for the Boy's Hat and Impeccable for the girls hat--cuz those are the colors I had.  (Thank you to everyone who donates yarn to me so I can make hats for the homeless, hospitals and prayer shawls/lapghans!!!)
Size I Hook.

Size:  Newborn.  For a smaller size Preemie you could use a G hook;  For a toddler, you could use a K Hook.  Just guessing here as I have only made the newborn size.

Sts Used:    sc, hdc , dc,
Lazy Shell (sc in indicated chain, ch 3, 2 dc in same ch 3),
Modified Lazy Shell (sc in indicated chain, ch 3, 1 dc in same ch3),
Hdc ribbing (ch indicated number of stitches, hdc across row, ch 2, turn, hdc in BACK LOOP of each hdc of previous row.  Repeat until desired length),
Crab Stitch (sc backward to end of row and join in 1st sc).

Shrinking Rib (this is made after body of hat is finished.  It draws the top of the hat together and makes a neat pattern):  ch 6, turn, sl st in first 2 sts, sc in next 2 sts, hdc in last st.  Turn.  Working in Back Loops only for the rest of the SR:  sl st in next 3 sts on row below on body, turn work, hdc in 1st st (remember back loops only), sc in next 2 sts, sl st in last 2 sts.   *turn work, sl st in first 2 sts, sc in next 2 sts, hdc in next st.  sl st in next  3 sts on body of hat (this is to decrease so you can work 2 or 3 as you see the work sitting flat), turn work, hdc in hdc, sc in each of next 2 sc (again in back loops only), sl st in next 2 sl st. * until you have reached the beginning of the work. sl st last row and first row together,  Fasten off, weave in ends.   If you ended up in the center of the work, leave a long tail of yarn and sew the opening closed.  If you end up at the other end away from the circle, just cut yarn, take a long piece of yarn and a yarn needle and sew center closed.

Instructions:
Ribbing--
Row 1: Ch 10.  Hdc in 2nd ch from hook, hdc across chain.  8 hdc
Row 2:   TURN, Ch 2.  IN BACK LOOPS ONLY, hdc in each hdc across.  8 hdc.
Row 3-24: Repeat Row 2.
This piece when laid flat and not stretched measured 12".

Next:  Fold ends to meet (making a circle) and slip stitch the end rows together, turn piece so that seam is inside the hat and continue working on this piece.

This is the part that decides if it is a boy's or girl's hat--
For Girls:  (working a sc in the ridge part of the ribbing and 5 dc in the middle of each ridge section around.)  To clarify:  ch 1, sc in same st as last sl st.  sk end of this hdc row and place 5 dc (shell)  in end of next row.  *sc in end of ridge, 5 dc in end of next row* around.   Join in first sc.  (12 sc, 12 5-dc shells)  Fasten off and weave in ends.
PHOTO
For Boys:  You can either leave it plain and start working on the body of the hat from this very same position OR you can do a Crab Stitch (Backward Single Crochet) around the edges.  If you do the Crab Stitch, join at end of row, fasten off, weave in ends.

Body of Hat--
Attach yarn at opposite end of seam, ch 1, sc in same st as joining.

Row 1: ch 3, place 2 dc in the sc you just made, sk 1 st.  *sc in next st, ch 3, place 2 dc in the side of the sc you just made* (lazy shell made).  Work in this way around the side rows of the ribbing opposite the girl/boy edging of course.  Join in 1st sc.  (20 lazy shells)

Row 2: TURN WORK, ch 1, sc in base of joining, ch 3, 2 dc in side of sc just made.
Sc into ch 3 of previous row/next lazy shell.  ch 3, 2 dc under same ch 3 space.  (finished lazy shell).  *sc under ch 3 of next lazy shell on last row, ch 3, 2 dc under same ch 3 space* around.  Join with sl st in first sc.  (21 lazy shells)

Row 3: ch 1, TURN, sl st in 1st 2 dc and into ch 3 of previous lazy shell.  Ch 1, in ch 3 place a Lazy Shell (ch 1, sc, ch3, 2 dc all in next ch 3).  Repeat around.  (Piece will start looking incredibly large.  Not to worry)  Join with sl st in 1st sc.  (21 lazy shells)

Row 4: TURN, sl st in 1st 2 dc and into ch3 of previous lazy shell.  Ch 1, sc in same space, ONE (1) dc in ch 3.  *sc in next ch 3, ch 3, 1 dc in same ch 3 (Modified Lazy Shell).  Proceed to put a Modified Lazy Shell in each Lazy Shell around.  Join to beginning sc.
(21 Modified Lazy Shells).

Row 5: Ch 2, Place 2 hdc in each ch 3 around.  (42 hdc)  (Note:  I worked this row quite tight.)

INNER RIBBING:

Row 1: `ch 7, turn, working back on ch you just made,  sk first loop, sl st in next 2 ch, sc in next 2 ch, hdc in last ch.  Now comes the "interesting part--)  sk joining, sl st in next 2 hdc on last row worked.

Row 2: turn work so little "tail thingy" is on your left.  IN BACK LOOP ONLY, make a hdc in 1st hdc on tail,  sc in each of next 2 sc (again back loops only...you will be making a shrinking rib), sl st in next 2 sl sts.  (hard work but u can do it--I just pick up whatever I can get in the back loop and go on.   doesn't show)

Row 3: ch 1, sl st in bk lp only of 1st 2 sl sts, sc in bk lp of next 2 sc, hdc in hdc.
sl st in next 3 sts on body of hat....
Continue in this manner until you are at the beginning.  If you have a problem, consult the directions above for Shrinking Rib.  You can always email me for clarity.  Emmalemmon47@yahoo.com


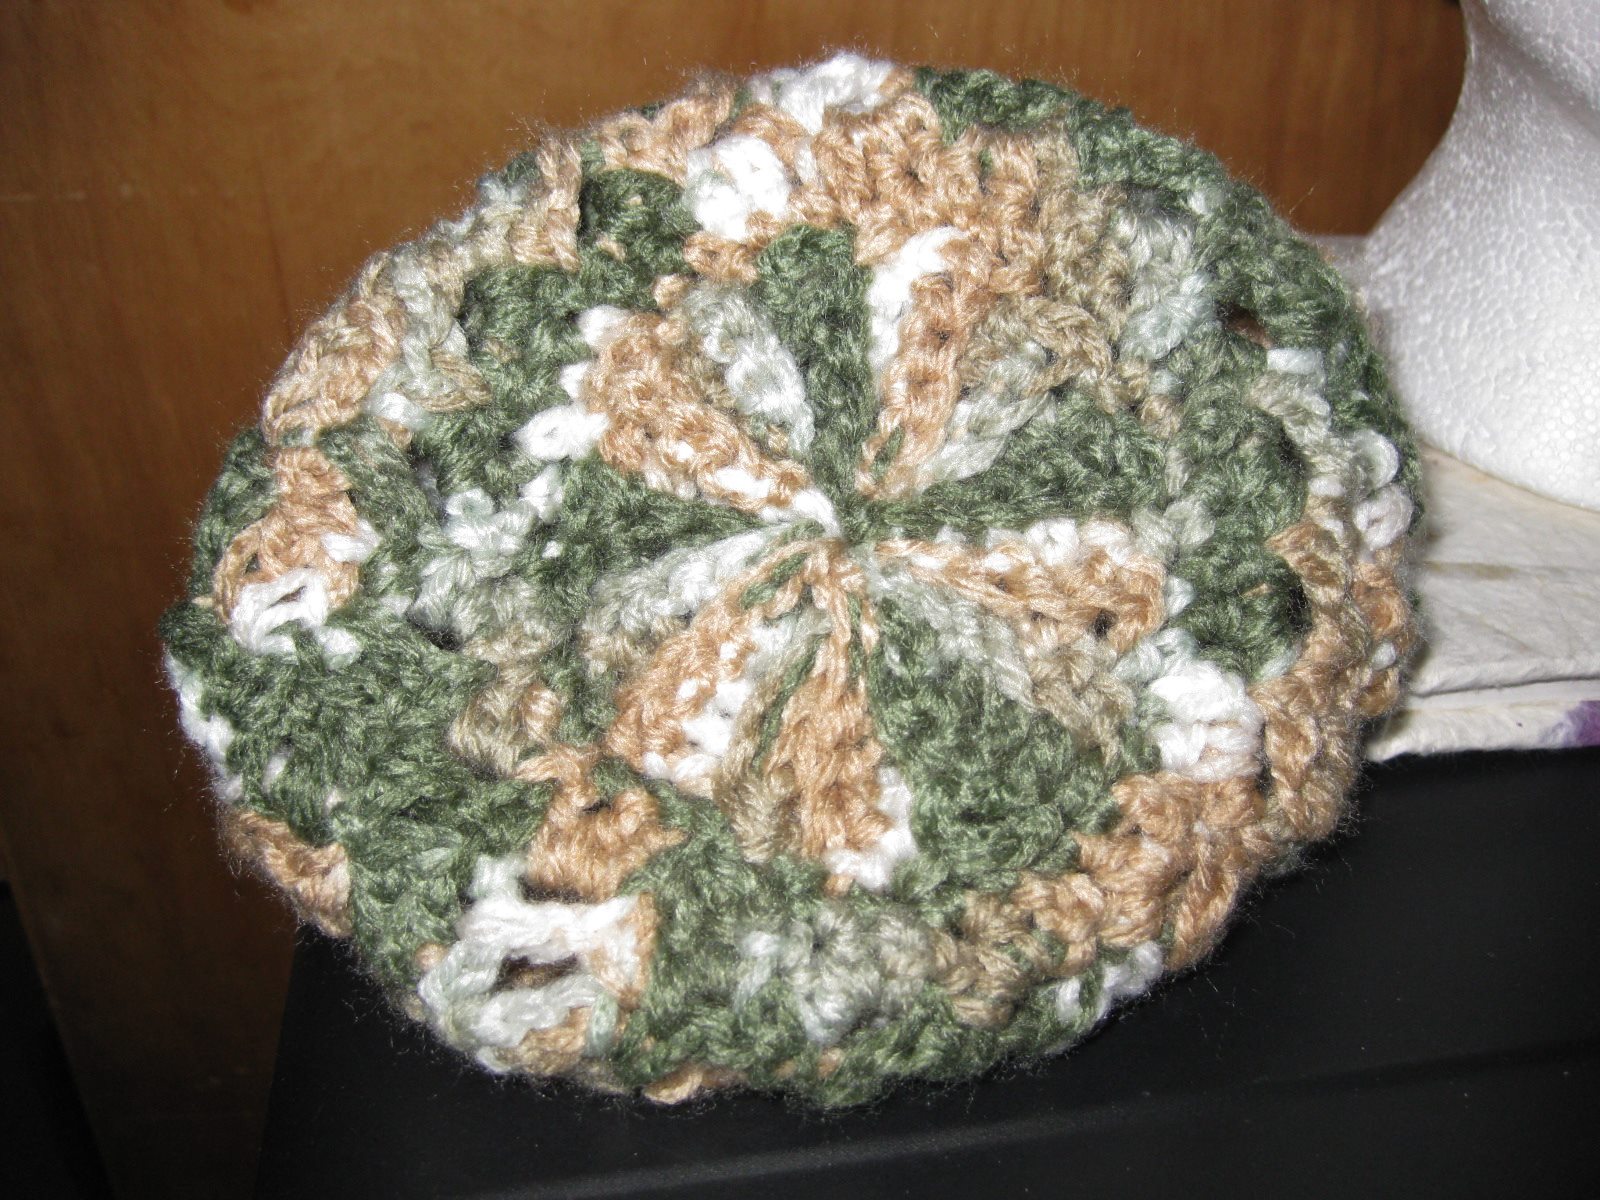
View of top of hat w/shrink rib.


Thursday, December 29, 2011

Quick & Easy Lacy Shoulderette Less than 5 hours!

Corrections made January 16, 2012:   SECOND FRONT, Row 12:  Ch 3, skip st, V-st across DC IN LAST DC, Turn.  (4 V-sts)  
Row 1 of edgework:  TURN,  Ch 3, V-st in each st to last st, V-st around...etc.
Row 2:  Ch 3, V-st in each V-st around to last dc.  You can increase with an occasional lacy V-st to keep work flat.


I have been so down that I have not blogged so that I may not inflict myself on the world.  (somewhere in there is part of a quote from Mark Twain (I shall lie abed until noon so that I may not inflict myself on the world).  Anyway, I have been making prayer shawls for many years and I have yet to find one that is so quick and easy and lacy and pretty (she says unabashedly).
This pattern has not been tested because there is only me....I have made 3 of them and am on my fourth and they all came out the same...whethere this is my brain remembering or the pattern is right, I have yet to know.  Smile.


PRAYER SHOULDERETTE OR QUICK AND LACY SHAWLETTE (5 hours or less)
I got the idea for this shoulderette from a photo of Tammy Hildebrand’s for her BLUE SKIES JACKET (July 2008 CROCHET MAGAZINE.COM).  Thank you, Ms. Hildebrand.

Skill Level:  Towards Intermediate

Finished Measurement:  25” across back of shoulders;  middle of neck to bottom of back -= 15”;  From shoulder to front point = 16”

MATERIALS:  --For the green, I used #3 weight yarn (ends I had with no label), off-white is #4 worsted weight yarn (Wintuk 3.5 oz, 4 ply)  You need 2 skeins or approximately 8 oz.
--Hook size “M” (M/13-9.00) (I found metal was the quickest)
--lg-eyed needle to weave in ends

Gauge:  Not Important.  One Size Fits Most

Pattern Notes:        1)  ch-3 at beginning of row counts as first dc.
2)    Special Stitches:
V-ST = (dc, ch 1, dc) all in stitch indicated.
Lacy V-ST = (dc, ch 1, dc, ch 1, dc) in stitch indicated.
  3)  Ch 3 counts as dc throughout.

SHOULDERETTE  (I personally pray as I make these.  Sometimes for the person who will receive it and sometimes for myself to keep me close to God.  At times I pray for the world and Peace.  It makes me feel serene and useful – and closer to Heaven.  You of course don’t have to.  Just for me, since my oldest son died this past March 2011, I find great need of this.  And it is helping.)


BACK:  Chain 53.
Row 1:  Sc in 2nd chain from hook and in each chain across.  TURN. (52 sc)

Row 2:  Ch 3, sk next 2 sts, *V-st in next st, sk next 2 sts* across, end with dc in last stitch.  TURN EACH ROW IF I FORGET TO MENTION IT.  Smile.   (16 V-sts)

Row 3-14:  Ch 3, V-st in center of each V-st across, dc in last stitch, TURN  (16 V-sts)

Row 15:  Ch 3,  dc in 1st V-st, V-st in each V-st to last V st.  Dc in last V-st and Dc.
(14 V-sts)
Row 16:  Ch 3, Skip next dc, V-st across to last 2 dc, Dc in last Dc.  Fasten Off.

FIRST FRONT       Turn work so that starting chain is at the top and Right Side of sc row is facing you.

Row 1:    Attach yarn in 1st chain, ch 3, skip next 2 chains, *V-st in next chain, skip 2 chains* across until you have 7 V-sts, skip 2 chains, dc in next chain, TURN.
Row 2:    Ch 3, V-st in ea V-st across, dc in last dc.  (7 V-sts)

Row 3:    Repeat Row 2.

[decrease rows]  NOTE:  dec sts are made at side edge)
Row 4:    Ch 3, V-st across.  Do not work in last dc.  TURN

Row 5:    Slst into V-st, Ch 3, dc in same V-st, V-st across, dc in last dc.

Row 6:    Ch 3, V-st across to last dc & Ch 3, sk dc and dc in top of ch 3. TURN.

Row 7:    Ch 3, 2 dc in 1st V-st, V-st to end, dc in last st.  TURN.

Row 8:    Ch 3, V-st across to last 3 sts.  Dc in next dc, sk 1 dc, dc in last st.  TURN      (6 V-sts)

Row 9:    Ch 3, sk next dc, V-st across, dc in last dc.  TURN.  (5 V-sts)

Row 10:  Ch 3, V-st across 5 V-sts, skip last st.  TURN.

Row 11:  Slst into V-st, ch 3, dc in same V-st, V-st across, dc in last st.  TURN.   (4 V-sts)

Row 12:  Ch 3, V-st in 4 V-sts, skip next dc.  Dc in last st.  TURN.

Row 13:  Ch 3, 2 dc in 1st V-st.  V-st across, dc in last st.  TURN.  (3 V-sts)

Row 14:  Ch 3, V-st across to last 3 sts, dc in next st, skip 1 st, dc in last st.  TURN.

Row 15:  Ch 3, sk next st, V-st in each V-st, skip last st.  TURN.  (dc—3 V-sts—dc)

Row 16:  Repeat Row 11.  Fasten Off.

SECOND FRONT:  W/ starting ch at top and right side facing, skip 2 sts,  attach yarn,

Row 1:    ch 3, skip 2 ch, *V-st in next ch, sk 2 ch* across to last 3 chs.  Sk 2 chs, dc in last st.  (7 V-sts)  TURN.

Row 2-3: Ch 3, V-st in ea V-st across, dc in last st TURN.  (7 V-sts)

[decrease rows] 
Row 4:    Ch 3, 2 dc in 1st V-st, V-st across, dc in lst st.  TURN  (6 V-sts)

Row 5:    Ch 3, V-st across to last 3 sts, dc in next dc, sk next st, dc in last st.  TURN.  (6 V-sts)

Row 6:    Ch 3, sk next st, V-st across, dc in last st.  TURN (6 V-sts)

Row 7:    Ch 3, V-st across, skip last dc.  TURN  (6 V-sts)
Row 8:    Ch 3, dc in 1st V-st, V-st across, dc in last st TURN.  (5 V-sts)

Row 9:    Ch 3, V-st across to last 2 sts, skip st, dc in last st.  TURN.  (5 V-sts)

Row 10:  Ch 3, 2 dc in 1st V-st, V-st across, dc in last st.  TURN.

Row 11:  Ch 3, V-st across to last 3 sts, dc in next st, skip st, dc in last st.  TURN.  (4 V-sts)

Row 12:  Ch 3, skip st, V-st across, Dc in last dc.  TURN  (4 V-sts)

Row 13:  Ch 3, V-st across, skip last st.  TURN.  (4 V-sts)

Row 14:  Ch 3, dc in 1st V-st, V-st across, dc in last st.  TURN.

Row 15:  Ch 3, V-st to last 2 sts, skip st, dc in last st.  TURN  (3 V-sts)

Row 16:  Ch 3, V-st across, dc in last st.  (3 V-sts)  
DO NOT FASTEN OFF.
From this point on, you will be working around side edges of shoulderette)

Row 1:    TURN.  Ch 3, V-st in each st to last st, V-st around the ch 3 (corner), V-st in end of next 2 rows.  Continue to V-st in end of each row around to next corner.  You will place a Lacy V-st [dc, ch 1, dc, ch 1, dc] in ch3 just before corner at row end st.  --You are essentially V-st’ing around, end dc in last st (without working the neckline).  TURN.

Row 2:    Ch 3, V-st in each V-st around to last dc.   [NOTE:  add an occasional lacy V-st to ease fit.  TURN.

Row 3:    Ch 3, *V-st in 1st st, dc lacy V-st in next st* around to last st.  Turn work so you will b working around neck edge:
      
Working around ch 3, (last st of previous row) work Lacy V-st, work in ends of each row up to starting chain.   (alternating V-st, Lacy V-st still).
Sk 1 chain, Lacy V-st in next ch, sk 1 ch, V-st, Lacy V in ends of rows to starting chain of previous row.  Dc in base of Ch 3, Ch 1, slst in top of beginning ch 3.

FO.  Weave in ends.  Voila.