Showing posts with label Crochet. Show all posts

Thursday, August 08, 2013

Easy Peasy Moebius, Getting older, Learning New Stuff

I have been trying my darndest to get into my blog and the rules have changed and so I have to learn something new.....slowly but surely.  I am getting on in years...I admit it.  I finally gave in and bought a "cane seat" so that when I am walking -- and I do walk every day -- and things start hurting, I can whip out that little seat and sit down.  Before I was just stopping where I was until I could go on but I was afraid the neighbors would think I had to go to the bathroom or something.  Embarrassment.  whoa.

Anyway, I created this easy peasy moebius as a quick gift for elderly women who have no family so that RSVP can give it to them at Christmas.  I have made 2 of them.  No one has tested the pattern, but I do have 2 friends who are going to give it a try.  I sure hope you can use this pattern. I love sharing.  Linda


Easy Peasy Moebius 

by Linda Graimm


Worsted Weight yarn  (I used Caron Simply Soft in Pagoda, I think the color was...something like that)
Size J or K hook....whichever you feel more comfortable with
Gauge:  makes no never mind  Smile

PATTERN:

Leaving a long chain about 12", Chain 127

Single crochet in 4th chain from hook, chain 3.

Row 1:   Skip 2 chains, single crochet in next chain across.  ( you may end up with 1 or 2 extra chains.  Ignore them and work them in later.  You need to have a number of ch 3 spaces across that are divisible by 2 with 1 extra so that you start with a ddcs and end with a ddcs (see next row).

Row 2:   Turn work.  Chain 2, in first chain 3 space place:  (double crochet - ch 1 - double crochet - ch 1 double crochet)  (double double crochet shell = ddcs);   *Skip next ch 3 space and in next chain 3 space, place a ddcs*  across the row, ending with a ddcs.

at this point, you will lie the work down and make one twist in the work and then slip stitch in first dc of row just worked (skipping the chain 2) to connect the row.  Now you will work around in rows and the work will have a twist in it.  You will use the beginning long chain to sew the first row together to make work look neater.

Row 3:   slip stitch into first ch 1 sp in ddcs, ch 1, sc in same space.  *Chain 3, sc in next ch 1 space* across row.   Slip stitch in first sc.

Row 4:   Slip stitch into first ch 3 space.  Ch 2,  place ddcs into same ch 3 space,  *skip next chain 3 space and place ddcs into next ch 3 space* across.  ending slip stitch into first dc of first ddcs.

Repeat Rows 3 and 4 until as wide as you want the moebius (for sure to fit around your head plus 4 rows or 6 rows if you don't like snug things.  Finish off with ROW 3....this leaves a somewhat lacy edging to match beginning.    Weave in ends and let me know how it goes.
emmalemmon47@yahoo.com

Tuesday, April 02, 2013

This is such a warm hat!

Baby's Baker Hat

Worsted wt Yarn (#4.  I used Red Heart Super Saver in blue variegated for the Boy's Hat and Impeccable for the girls hat--cuz those are the colors I had.  (Thank you to everyone who donates yarn to me so I can make hats for the homeless, hospitals and prayer shawls/lapghans!!!)
Size I Hook.

Size:  Newborn.  For a smaller size Preemie you could use a G hook;  For a toddler, you could use a K Hook.  Just guessing here as I have only made the newborn size.

Sts Used:    sc, hdc , dc,
Lazy Shell (sc in indicated chain, ch 3, 2 dc in same ch 3),
Modified Lazy Shell (sc in indicated chain, ch 3, 1 dc in same ch3),
Hdc ribbing (ch indicated number of stitches, hdc across row, ch 2, turn, hdc in BACK LOOP of each hdc of previous row.  Repeat until desired length),
Crab Stitch (sc backward to end of row and join in 1st sc).

Shrinking Rib (this is made after body of hat is finished.  It draws the top of the hat together and makes a neat pattern):  ch 6, turn, sl st in first 2 sts, sc in next 2 sts, hdc in last st.  Turn.  Working in Back Loops only for the rest of the SR:  sl st in next 3 sts on row below on body, turn work, hdc in 1st st (remember back loops only), sc in next 2 sts, sl st in last 2 sts.   *turn work, sl st in first 2 sts, sc in next 2 sts, hdc in next st.  sl st in next  3 sts on body of hat (this is to decrease so you can work 2 or 3 as you see the work sitting flat), turn work, hdc in hdc, sc in each of next 2 sc (again in back loops only), sl st in next 2 sl st. * until you have reached the beginning of the work. sl st last row and first row together,  Fasten off, weave in ends.   If you ended up in the center of the work, leave a long tail of yarn and sew the opening closed.  If you end up at the other end away from the circle, just cut yarn, take a long piece of yarn and a yarn needle and sew center closed.

Instructions:
Ribbing--
Row 1: Ch 10.  Hdc in 2nd ch from hook, hdc across chain.  8 hdc
Row 2:   TURN, Ch 2.  IN BACK LOOPS ONLY, hdc in each hdc across.  8 hdc.
Row 3-24: Repeat Row 2.
This piece when laid flat and not stretched measured 12".

Next:  Fold ends to meet (making a circle) and slip stitch the end rows together, turn piece so that seam is inside the hat and continue working on this piece.

This is the part that decides if it is a boy's or girl's hat--
For Girls:  (working a sc in the ridge part of the ribbing and 5 dc in the middle of each ridge section around.)  To clarify:  ch 1, sc in same st as last sl st.  sk end of this hdc row and place 5 dc (shell)  in end of next row.  *sc in end of ridge, 5 dc in end of next row* around.   Join in first sc.  (12 sc, 12 5-dc shells)  Fasten off and weave in ends.
PHOTO
For Boys:  You can either leave it plain and start working on the body of the hat from this very same position OR you can do a Crab Stitch (Backward Single Crochet) around the edges.  If you do the Crab Stitch, join at end of row, fasten off, weave in ends.

Body of Hat--
Attach yarn at opposite end of seam, ch 1, sc in same st as joining.

Row 1: ch 3, place 2 dc in the sc you just made, sk 1 st.  *sc in next st, ch 3, place 2 dc in the side of the sc you just made* (lazy shell made).  Work in this way around the side rows of the ribbing opposite the girl/boy edging of course.  Join in 1st sc.  (20 lazy shells)

Row 2: TURN WORK, ch 1, sc in base of joining, ch 3, 2 dc in side of sc just made.
Sc into ch 3 of previous row/next lazy shell.  ch 3, 2 dc under same ch 3 space.  (finished lazy shell).  *sc under ch 3 of next lazy shell on last row, ch 3, 2 dc under same ch 3 space* around.  Join with sl st in first sc.  (21 lazy shells)

Row 3: ch 1, TURN, sl st in 1st 2 dc and into ch 3 of previous lazy shell.  Ch 1, in ch 3 place a Lazy Shell (ch 1, sc, ch3, 2 dc all in next ch 3).  Repeat around.  (Piece will start looking incredibly large.  Not to worry)  Join with sl st in 1st sc.  (21 lazy shells)

Row 4: TURN, sl st in 1st 2 dc and into ch3 of previous lazy shell.  Ch 1, sc in same space, ONE (1) dc in ch 3.  *sc in next ch 3, ch 3, 1 dc in same ch 3 (Modified Lazy Shell).  Proceed to put a Modified Lazy Shell in each Lazy Shell around.  Join to beginning sc.
(21 Modified Lazy Shells).

Row 5: Ch 2, Place 2 hdc in each ch 3 around.  (42 hdc)  (Note:  I worked this row quite tight.)

INNER RIBBING:

Row 1: `ch 7, turn, working back on ch you just made,  sk first loop, sl st in next 2 ch, sc in next 2 ch, hdc in last ch.  Now comes the "interesting part--)  sk joining, sl st in next 2 hdc on last row worked.

Row 2: turn work so little "tail thingy" is on your left.  IN BACK LOOP ONLY, make a hdc in 1st hdc on tail,  sc in each of next 2 sc (again back loops only...you will be making a shrinking rib), sl st in next 2 sl sts.  (hard work but u can do it--I just pick up whatever I can get in the back loop and go on.   doesn't show)

Row 3: ch 1, sl st in bk lp only of 1st 2 sl sts, sc in bk lp of next 2 sc, hdc in hdc.
sl st in next 3 sts on body of hat....
Continue in this manner until you are at the beginning.  If you have a problem, consult the directions above for Shrinking Rib.  You can always email me for clarity.  Emmalemmon47@yahoo.com


View of top of hat w/shrink rib.


Wednesday, March 27, 2013

Grow-able Hat Crochet Pattern


BOYS (& Girls) Reversible and Grow-able Hat


This is a Very Easy Pattern.
Worsted Wt Yarn.  I used Impeccable and then RedHeart and both worked.
Size J crochet Hook

I would say that this pattern fits a 4 or 5 year old and can grow into a 7 or 8 year old.  I have it on my little mannequin head and it fits well.  You could do the same pattern with a larger hook for a teen or adult and a smaller hook for a younger one.   My friend Pat tested this for me and made the girl's version.

The Right Side of the work is for the smaller size.


NOTE#1:  Adjust pattern in any way you wish.  I made one that had alternating rows of hdc/sc for the first 8 rows and it made the hat smaller and warmer on the top.  Feel free to post or use this pattern anywhere, even to selling the finished product.... except to claim it as your own.

Thanks.

INSTRUCTIONS:

Row 1:  (RIGHT SIDE OF WORK) ch 3, 6 sc in 2nd ch.  Join.  Pull yarn tight.

Row 2:  ch 2, 2 hdc in each sc around (14 hdc)

Row 3:  ch 2, *2 hdc in first hdc, 1 hdc in next hdc* around.  (21 hdc)

Row 4:  ch 2,  *2 hdc in first hdc, 1 hdc in each of next 2 hdc* around.
(28 hdc)

Row 5: ch 2,  *2 hdc in first hdc, 1 hdc in each of next 3 hdc* around.  (35 hdc)

Continue increasing each row, using hdc, until you have 49 sts.
(should be 2 more rows)

Row 8: ch 2, hdc around, increasing 3 sts evenly space so that you end up with 52 sts.

Row 9-19:  ch 2, hdc in each st around (52 sts)

Row 20:  TURN WORK:  ch 3, dc in back loop of each stitch around.
Join.

Row 21:  ch 2, dc in each st around (NOT back loop).  Join.
Fasten off.

NOTE#2:  You could also make this into a girls' hat by using "girly" colors and even adding a row after the two brim rows----:  ch 1, sc in first st,  skip 2 sts, 5 dc in next st, *skip 2 sts, sc in next st, skip 2 sts, 5 dc in next st*.  Repeat ** around.


This is now a reversible, growable hat...as soon as you tuck or weave in the ends.  Smile.    When you turn the hat inside out it "grows".

Thursday, December 29, 2011

Quick & Easy Lacy Shoulderette Less than 5 hours!

Corrections made January 16, 2012:   SECOND FRONT, Row 12:  Ch 3, skip st, V-st across DC IN LAST DC, Turn.  (4 V-sts)  
Row 1 of edgework:  TURN,  Ch 3, V-st in each st to last st, V-st around...etc.
Row 2:  Ch 3, V-st in each V-st around to last dc.  You can increase with an occasional lacy V-st to keep work flat.


I have been so down that I have not blogged so that I may not inflict myself on the world.  (somewhere in there is part of a quote from Mark Twain (I shall lie abed until noon so that I may not inflict myself on the world).  Anyway, I have been making prayer shawls for many years and I have yet to find one that is so quick and easy and lacy and pretty (she says unabashedly).
This pattern has not been tested because there is only me....I have made 3 of them and am on my fourth and they all came out the same...whethere this is my brain remembering or the pattern is right, I have yet to know.  Smile.


PRAYER SHOULDERETTE OR QUICK AND LACY SHAWLETTE (5 hours or less)
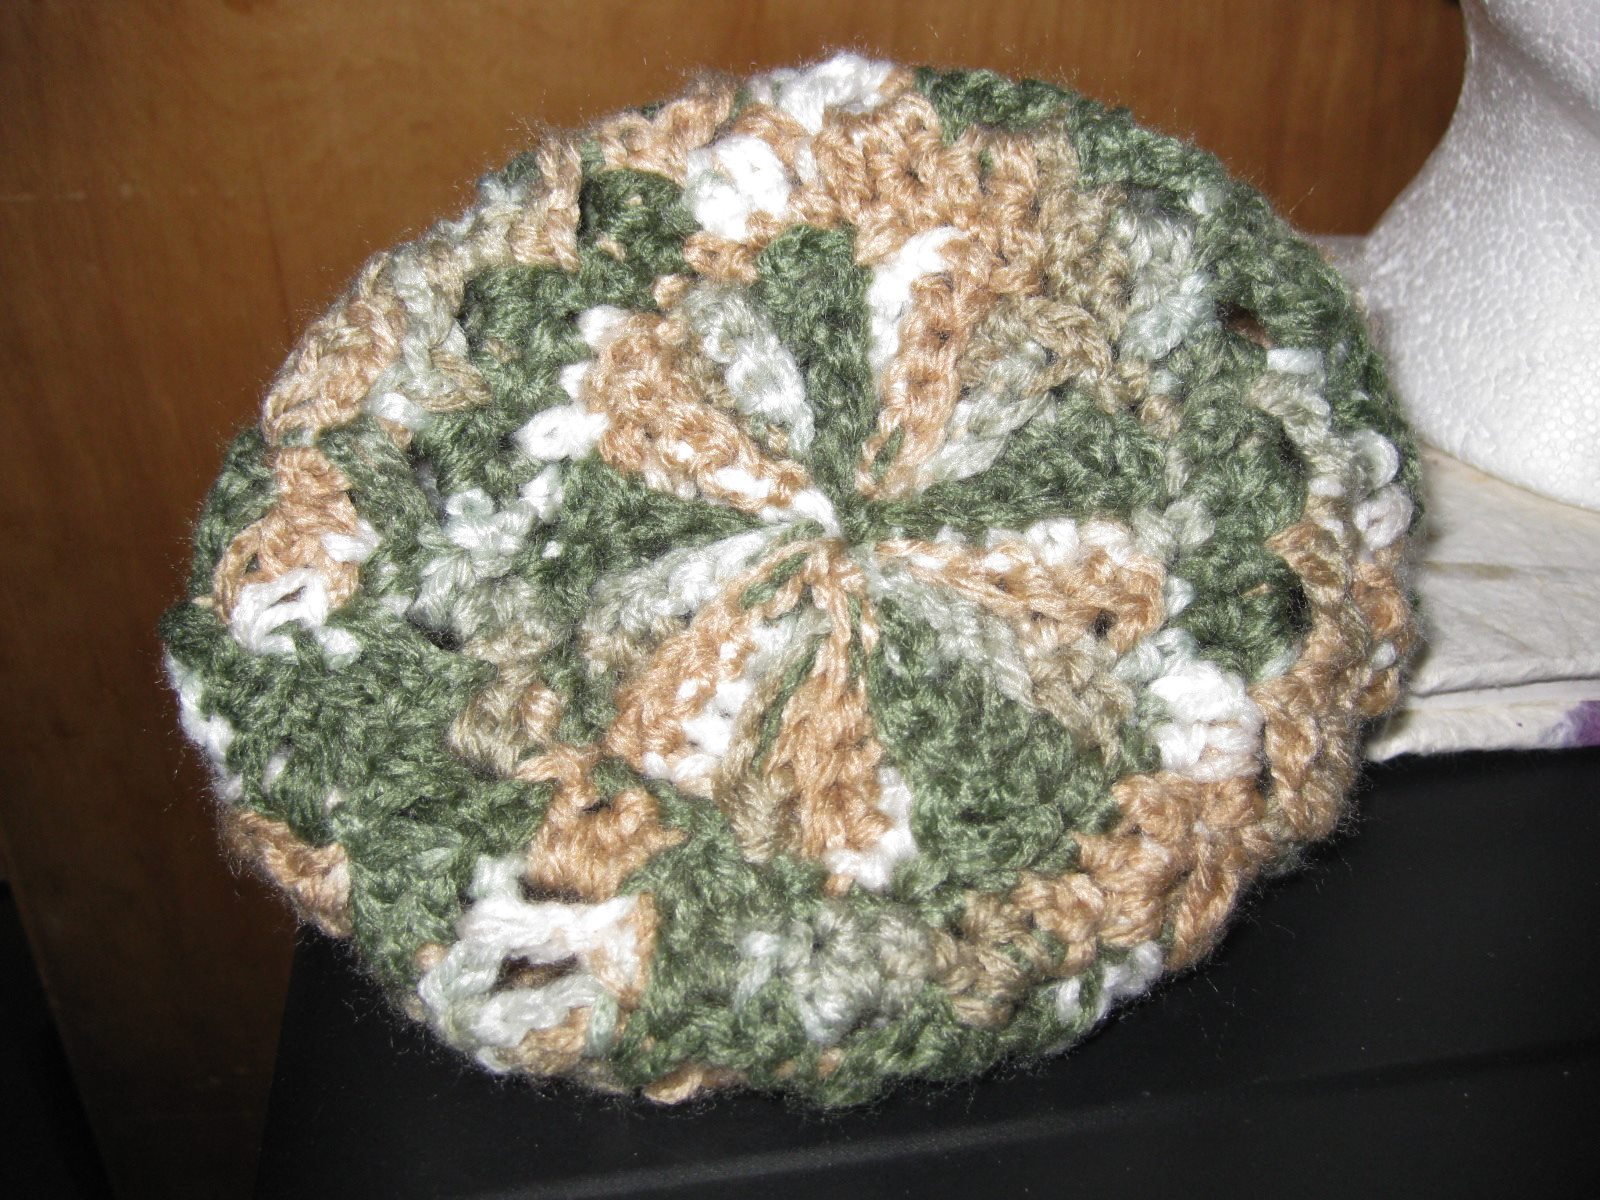
I got the idea for this shoulderette from a photo of Tammy Hildebrand’s for her BLUE SKIES JACKET (July 2008 CROCHET MAGAZINE.COM).  Thank you, Ms. Hildebrand.

Skill Level:  Towards Intermediate

Finished Measurement:  25” across back of shoulders;  middle of neck to bottom of back -= 15”;  From shoulder to front point = 16”

MATERIALS:  --For the green, I used #3 weight yarn (ends I had with no label), off-white is #4 worsted weight yarn (Wintuk 3.5 oz, 4 ply)  You need 2 skeins or approximately 8 oz.
--Hook size “M” (M/13-9.00) (I found metal was the quickest)
--lg-eyed needle to weave in ends

Gauge:  Not Important.  One Size Fits Most

Pattern Notes:        1)  ch-3 at beginning of row counts as first dc.
2)    Special Stitches:
V-ST = (dc, ch 1, dc) all in stitch indicated.
Lacy V-ST = (dc, ch 1, dc, ch 1, dc) in stitch indicated.
  3)  Ch 3 counts as dc throughout.

SHOULDERETTE  (I personally pray as I make these.  Sometimes for the person who will receive it and sometimes for myself to keep me close to God.  At times I pray for the world and Peace.  It makes me feel serene and useful – and closer to Heaven.  You of course don’t have to.  Just for me, since my oldest son died this past March 2011, I find great need of this.  And it is helping.)


BACK:  Chain 53.
Row 1:  Sc in 2nd chain from hook and in each chain across.  TURN. (52 sc)

Row 2:  Ch 3, sk next 2 sts, *V-st in next st, sk next 2 sts* across, end with dc in last stitch.  TURN EACH ROW IF I FORGET TO MENTION IT.  Smile.   (16 V-sts)

Row 3-14:  Ch 3, V-st in center of each V-st across, dc in last stitch, TURN  (16 V-sts)

Row 15:  Ch 3,  dc in 1st V-st, V-st in each V-st to last V st.  Dc in last V-st and Dc.
(14 V-sts)
Row 16:  Ch 3, Skip next dc, V-st across to last 2 dc, Dc in last Dc.  Fasten Off.

FIRST FRONT       Turn work so that starting chain is at the top and Right Side of sc row is facing you.

Row 1:    Attach yarn in 1st chain, ch 3, skip next 2 chains, *V-st in next chain, skip 2 chains* across until you have 7 V-sts, skip 2 chains, dc in next chain, TURN.
Row 2:    Ch 3, V-st in ea V-st across, dc in last dc.  (7 V-sts)

Row 3:    Repeat Row 2.

[decrease rows]  NOTE:  dec sts are made at side edge)
Row 4:    Ch 3, V-st across.  Do not work in last dc.  TURN

Row 5:    Slst into V-st, Ch 3, dc in same V-st, V-st across, dc in last dc.

Row 6:    Ch 3, V-st across to last dc & Ch 3, sk dc and dc in top of ch 3. TURN.

Row 7:    Ch 3, 2 dc in 1st V-st, V-st to end, dc in last st.  TURN.

Row 8:    Ch 3, V-st across to last 3 sts.  Dc in next dc, sk 1 dc, dc in last st.  TURN      (6 V-sts)

Row 9:    Ch 3, sk next dc, V-st across, dc in last dc.  TURN.  (5 V-sts)

Row 10:  Ch 3, V-st across 5 V-sts, skip last st.  TURN.

Row 11:  Slst into V-st, ch 3, dc in same V-st, V-st across, dc in last st.  TURN.   (4 V-sts)

Row 12:  Ch 3, V-st in 4 V-sts, skip next dc.  Dc in last st.  TURN.

Row 13:  Ch 3, 2 dc in 1st V-st.  V-st across, dc in last st.  TURN.  (3 V-sts)

Row 14:  Ch 3, V-st across to last 3 sts, dc in next st, skip 1 st, dc in last st.  TURN.

Row 15:  Ch 3, sk next st, V-st in each V-st, skip last st.  TURN.  (dc—3 V-sts—dc)

Row 16:  Repeat Row 11.  Fasten Off.

SECOND FRONT:  W/ starting ch at top and right side facing, skip 2 sts,  attach yarn,

Row 1:    ch 3, skip 2 ch, *V-st in next ch, sk 2 ch* across to last 3 chs.  Sk 2 chs, dc in last st.  (7 V-sts)  TURN.

Row 2-3: Ch 3, V-st in ea V-st across, dc in last st TURN.  (7 V-sts)

[decrease rows] 
Row 4:    Ch 3, 2 dc in 1st V-st, V-st across, dc in lst st.  TURN  (6 V-sts)

Row 5:    Ch 3, V-st across to last 3 sts, dc in next dc, sk next st, dc in last st.  TURN.  (6 V-sts)

Row 6:    Ch 3, sk next st, V-st across, dc in last st.  TURN (6 V-sts)

Row 7:    Ch 3, V-st across, skip last dc.  TURN  (6 V-sts)
Row 8:    Ch 3, dc in 1st V-st, V-st across, dc in last st TURN.  (5 V-sts)

Row 9:    Ch 3, V-st across to last 2 sts, skip st, dc in last st.  TURN.  (5 V-sts)

Row 10:  Ch 3, 2 dc in 1st V-st, V-st across, dc in last st.  TURN.

Row 11:  Ch 3, V-st across to last 3 sts, dc in next st, skip st, dc in last st.  TURN.  (4 V-sts)

Row 12:  Ch 3, skip st, V-st across, Dc in last dc.  TURN  (4 V-sts)

Row 13:  Ch 3, V-st across, skip last st.  TURN.  (4 V-sts)

Row 14:  Ch 3, dc in 1st V-st, V-st across, dc in last st.  TURN.

Row 15:  Ch 3, V-st to last 2 sts, skip st, dc in last st.  TURN  (3 V-sts)

Row 16:  Ch 3, V-st across, dc in last st.  (3 V-sts)  
DO NOT FASTEN OFF.
From this point on, you will be working around side edges of shoulderette)

Row 1:    TURN.  Ch 3, V-st in each st to last st, V-st around the ch 3 (corner), V-st in end of next 2 rows.  Continue to V-st in end of each row around to next corner.  You will place a Lacy V-st [dc, ch 1, dc, ch 1, dc] in ch3 just before corner at row end st.  --You are essentially V-st’ing around, end dc in last st (without working the neckline).  TURN.

Row 2:    Ch 3, V-st in each V-st around to last dc.   [NOTE:  add an occasional lacy V-st to ease fit.  TURN.

Row 3:    Ch 3, *V-st in 1st st, dc lacy V-st in next st* around to last st.  Turn work so you will b working around neck edge:
      
Working around ch 3, (last st of previous row) work Lacy V-st, work in ends of each row up to starting chain.   (alternating V-st, Lacy V-st still).
Sk 1 chain, Lacy V-st in next ch, sk 1 ch, V-st, Lacy V in ends of rows to starting chain of previous row.  Dc in base of Ch 3, Ch 1, slst in top of beginning ch 3.

FO.  Weave in ends.  Voila.   

Friday, March 05, 2010

Faux Baseball Cap Pattern March 2010

FAUX BASEBALL CAP designed by Linda Graimm

This pattern has only been tested by me (over and over and over…) but if you find anything that you have questions about or seems to be wrong, please don’t hesitate to contact me at emmalemmon47@msn.com.

Boy or Girl size: 20” around

MATERIALS: Worsted Wt yarn; Size “H” hook, tapestry needle
Note: I used Caron Simply Soft, one skein of Berry Blue. Doesn’t take too much yarn to make this hat unless you have help from your beloved kitty, Bearli, who loves to play with yarn and rip things out.

GAUGE: 4 stitches = 1”, approx. 3 rows = 1”

NOTES:
1. Ch 2 does NOT count as stitch throughout.
2. Hdc Decrease (Hdc Dec): Wrap yarn around hook, put through stitch indicated stitch, pull up a loop, pull up a loop in next stitch, YO and pull through all loops on hook.
3. Front Post Double Crochet (FPdc): Place hook through post of stitch on row below from front to back to front, wrap yarn around hook, pull yarn through post, complete as a regular double crochet.
4. Back Post Double Crochet (BPdc): Place hook through post of stitch on row below from back to front to back, wrap yarn around hook, pull through post, complete as a regular double crochet.
5. When making FPdc or BPdc, the next stitch sort of gets “sucked up” into the post stitch. Don’t miss that next stitch!

INSTRUCTIONS:
Round 1: Ch 4, 8 hdc in 3rd ch from hook, join in top of beg ch 2 throughout unless otherwise indicated. (8hdc)

Round 2: Ch 2, 2 hdc in each stitch around, join (16 hdc)

Round 3: Ch 2, *hdc in next stitch, 2 hdc in next stitch* Repeat around, join. (24 hdc)

Round 4: Ch 2, *hdc in each of 2 stitches, 2 hdc in next stitch* Repeat around, join. (32 stitches)

Round 5: Ch 2, *hdc in each of 3 stitches, 2 hdc in next stitch* Repeat around, join. (40 stitches)

Round 6: Ch 2, *hdc in each of next 4 stitches, 2 hdc in next stitch* Repeat around, join. (48 stitches)

Round 7: Ch 2, L*hdc in each of next 5 stitches, 2 hdc in next stitch* Repeat around, join. (56 stitches)

Round 8: Ch 2, *hdc in each of next 6 stitches, 2 hdc in next stitch* Repeat around, join. (64 stitches)

Round 9: Ch 2, *hdc in each of next 7 stitches, 2 dc in next stitch* once, hdc in each of next 7 stitches, 7 DC in FRONT LOOP only of next stitch (Visor Shell started). Hdc in each of next 7 stitches, 2 hdc in next stitch* twice. 1 hdc in each of next 2 hdc, work FPdc over next stitch, *BPdc over next stitch, FPdc over next stitch* five times (11 stitches in ribbing). Hdc in next 2 stitches, hdc in next 7 stitches, 2 hdc in next stitch. Join.

Round 10: Ch 2, hdc in first 14 stitches. Sk 2 hdc, 2 dc in each of 7 Visor Shell stitches (14 stitches for shell); sk 2 hdc, hdc to 1 stitch before Ribbing. BPdc over next stitch, *FPdc over FPdc, BPdc over BPdc* to end of ribbing, BPdc over next stitch (13 Ribbing Stitches). Hdc to end, join.

Round 11: [Note: from here on in, *FPdc around all FPdc and BPdc around all BPdc*] Hdc in 10 stitches. Hdc decrease over next 2 stitches, sk next 2 stitches, *1 dc in next stitch, 2 dc in next stitch*. Repeat 6 more times (21 stitches on Visor Shell). Sk next 2 stitches, hdc decrease over next 2 stitches; hdc in next 21 stitches, hdc decrease over next 2 stitches, Repeat from * to * across ribbing stitches starting and ending with BPdc] {13 stitches in ribbing}, hdc decrease over next 2 stitches, hdc in last 10 stitches, join.

Round 12: Ch 2, hdc in first 7 stitches, hdc decrease over next 2 stitches, skip 2 stitches, place 3 double crochet in first Visor Shell stitch, dc in each of next 3 stitches, *3 dc in next stitch, dc in next 3 stitches* across Visor Shell, ending with 3 dc in last stitch of Shell. Skip two stitches, hdc decrease over next 2 stitches. Hdc in next 18 stitches. FPdc around next stitch (which was a hdc decrease in row below), *BPdc in each BPdc, FPdc in each FPdc across ribbing. At end of ribbing, FPdc around next stitch (15 stitches). Hdc in last 10 stitches of round, join.

Round 13: Ch 2, hdc in first 7 stitches; skip next stitch. Single Crochet in each stitch of Visor Shell (I did these stitches tightly because it helps the visor stand up/out) (33 stitches); skip next stitch, hdc in each of next 18 stitches, *FPdc around each FPdc, and BPdc around each BPdc* across ribbing (15 stitches in ribbing). Hdc in last 10 stitches, join.

Round 14: Ch 2, hdc in each of next 6 stitches, hdc decrease over next 2 stitches, slip stitch in next 31 sts, hdc decrease over 2 stitches, hdc in 14 sts. Hdc decrease over 2 stitches, *FPdc over FPdc, BPdc over BPdc* over ribbing (15 stitches), hdc decrease over next 2 stitches, hdc in last 8 stitches, join. FO, weave in ends.


I crocheted a little flat button for the top of the hat but you could use a button or leave plain if you would like.

When (and if--I did not block because Caron SS is so very soft) you block the cap (this is unblocked), you may have to pull ribbing straight. It really isn’t as crooked as it appears in the pictures. Really.
This hat was made the same as above, except the ribbing came first on the front and then I added the Visor Shell.  I made 5 of these for my grandkids all in Hunter Green for a picture session, and I got a little bored making the same thing so I experimented here and there.

Don't hesitate to contact me if there are problems or you have any questions.  emmalemmon47@msn.com
This, too, shall pass.

Sunday, February 14, 2010

Triangle Wheelchair Prayer Shawl

I saw a pattern on http://www.crochetville.org/ for a Triangle Stroller Blankie by Lubba_my_kiddos and thought it would make a great pattern for a Prayer Shawl/Lapghan for people who are wheelchair-bound.  So I jumped right in and this is the results.  There is no pattern, I just rounded off one of the corners from Lubba My Kiddos pattern and increased to "4 dc groups" instead of 3 dc groups to keep the shawl flat.  It was quick, easy and fun.  I used leftover yarn/stash.
Picture #2 shows the rounded corner.  I used dc into hdc's working to keep it centered.  Came out so well. 
Picture #3 is using the lapghan as a shawl.  I elongated the alternate two ends from the rounded ends by putting in a shell of 5 dc, ch 3, 5 dc toward the last 5 rows to make it long enough to work as a shawl. 


Wednesday, February 10, 2010

Caleb's Vest Pattern

Here I am back again with another pattern.  I have been remiss in my "duty" to myself in that I am not journaling like I used to, but I am having a great time designing patterns!  I hope you enjoy this pattern, Caleb's Vest.  My grandson loves it!!  The button is very optional.
Caleb’s Vest


Designed by Linda Graimm, emmalemmon47@msn.com


I made the lighter weight vest first and then thought it would be neat for a “wear-outside” vest but I wanted it smaller because I am not sure bigger boys today wear crocheted vests anymore. Sigh.

Size Large: Chest size, just under armholes—29”, 11-1/2” from underarm to bottom, 18-1/2” from shoulder to bottom
Size Small: [directions in parentheses] Chest size, just under armholes—27”, 9-1/2” from underarm to bottom, 15-1/2” from shoulder to bottom
Materials: For larger size, I used Impeccable Worsted in Soft Taupe, I used approx. 390 yards, size J crochet hook.  For smaller size, I used Bernat Chunky in Fern, approx. half of a skein (this is a huge skein!); Size H hook.


Gauge: For larger size, 12 hdc and 9 rows = 4”
For smaller size, 12 hdc and 9 rows = 4”


NOTE: Ch 2 at beginning of rows does NOT count as stitch; buttons or any other fastening is optional

BACK: Chain 45 [42]
Row 1: Hdc in 3rd chain from hook and in each ch across. 42 [39] sts.
Row 2: Ch 2, turn. Hdc in each st across. 42 [39] sts.
Row 3-22 [3-21]: Repeat Row 2.

Shape Armhole:
Row 23 [22]: Turn, slip stitch in first 3 sts, ch 2. Hdc across until 3 stitches remain, TURN. Do not work the remaining stitches. 39 [36] sts.
Row 24 [23]: Ch 2, hdc in each stitch across. 39 [36] sts.
Row 25-36 [24-35]: Ch 2, turn, hdc in each hdc across. Fasten Off.


Left Front: Ch 26 [22].
Row 1: Hdc in 3rd chain from hook and in each ch across. 24 [19] sts.
Row 2: Ch 2, turn. Hdc in each stitch across.
Row 3-22 [3-21]: Repeat Row 2. 24 [19] sts.

Row 23 [22]: (Armhole) Turn. Slip stitch in first 3 stitches, ch 2. Hdc in each stitch across. 21 [16] sts.
Row 24-32 [23-31]: Ch 2, turn, Hdc in each stitch across. 21 [16] sts.


Row 33 [32]: (Neck Edge) Ch 2, turn. Hdc in 14 [8]sts.
Row 34-36 [33-35]: Ch 2 turn. Hdc in each stitch across. 14 [8] sts.
Fasten Off.


Right Front: Ch 26 [22].
Row 1: Hdc in 3rd chain from hook and in each ch across. 24 [19] sts.
Row 2: Ch 2, turn. Hdc in each stitch across.
Row 3-22 [3-21]: Repeat Row 2. 24 [19] sts.


Row 23 [22]: (Armhole) Ch 2, Turn. Hdc in each stitch across, leaving last 3 stitches unworked. 21 [16] sts.
Row 24-32 [23-31]: Ch 2, turn, Hdc in each stitch across. 21 [16] sts.

Row 33 [32]: (Neck Edge)  Turn, slip stitch in first 10 [8] stitches, Hdc in 11 sts. 11 [8] sts.
Row 34-36 [33-35]: Ch 2 turn. Hdc in each stitch across. 11 [8] sts.
Fasten off.

Sew Shoulder & Side Seams.


Edging: Starting at lower edge of vest on one side seam, join yarn with slip stitch. Ch 2. You will be alternating Front Post HDC and Back Post HDC around sweater, placing them in (as much as you can) a stitch in each stitch and chain around.


Note: When you reach the side of the rows (up or down the front), place stitches so that work lies flat as possible.
Voila.

Sunday, January 24, 2010

Scitten Crochet Pattern

“Scitten” Designed by Linda Graimm

QUICK, EASY AND USE-ABLE!!

Size: The “scitten” (Scarf/mitten) shown fits an average woman’s reach. For a teen, you could use a smaller hook. For a man, you could chain 10 and work with 140 sts. For a toddler, work on 110 sts. The scarf is 4” wide and the length is 34”.

NOTE: Directions for toddler’s Scitten are in parentheses.
♥Thanks Pat Engle for testing this pattern for me!
Abbreviations Used:
ch Chain ea = Each FO = Fasten off
Hdc = Half-double crochet hk = Hook Rep = Repeat
Sc = Single crochet sk = skip sts = Stitch(es)

Gauge: not important, this is a fairly relaxed and easy pattern and is very flexible.

Materials: Worsted Wt yarn—2 colors, I used 1 skein of Red Heart Super Saver Delft Blue and a small amount of variegated wool; Crochet Hook Size “K”


NOTES:
1. All hdc’s are worked in the back loop only!
2. Turn work each row.
3. Hdc dec: YO, pull up a loop in this st, pull up a loop in next st, YO and pull through all 4 loops on hook.
Scarf part:
Using MC throughout. Ch 130 (110). Starting in 3rd chain from hk, hdc in ea ch across. (128/108 sts)

Row 2: (Turn work each row) ch 2. Hdc in first 4 sts. Ch 12 for hand opening, sk 10 sts, hdc in ea st until you have 14 sts left, chain 12, sk 10 sts, hdc in last 4 sts. (128/108 sts)

Row 3: Ch 2, hdc in ea st and ch across. (130/110 sts)

Row 4-8: Ch 2, hdc in ea st across. (130/110 sts)

Row 9: Ch 2, hdc in ea st across, dec’ing 2 sts evenly over slit that you made in row 2. (128/108 sts)

Row 10: Ch 2, work even. (128/109 sts) FO.

Next Step: With CC, sc around edge of hand opening; FO and weave in ends.

Mitten part: (Make 2) With MC, ch 24 (20).

Row 1: Hdc in 3rd ch from hk and across. (22/18 hdc).
Row 2: (turn every row) Ch 2, hdc in ea st across. (22/18 sts)
Row 3-11: Ch 2, rep row 2. (22/18 sts) FO.

FINISHING: Bring Mitten Part up behind one end of scarf and hand opening.

Using CC, and holding both thicknesses together, sc around entire scarf, sc’ing mitten parts so that they line up behind scarf and over hand openings(put 3 sc in ea corner) (you will be making a “pocket” for the hand to fit into the slit and rest inside.

FO. Weave in ends.

==Using a strand of MC, with running st or back st, sew remaining opening closed.
If you have a problem, please email me at emmalemmon47@yahoo.com

Monday, August 10, 2009


The hat on the right was a test pattern for me. It is made with shells and I discovered too late that I should have (oh, those should-haves!) planned ahead and the ends shells would have been more even. Anyway.
Our weather has been absolutely perfect! I even ventured to the store and didn't die from the heat. yay. I know that many ppl prefer heat but I like medium. I'm with John Denver when he sings, "I'm the kind of guy who likes to stand in the middle, I don't like all this jumping back and forth, me I'd like to live with my feet in Dixie and my head in the cool, cool North." tehee.
I have been catching up on correspondence, cutting postcards and bookmarks from old greeting cards (now I have to run the postcards thru the printer for side 2), playing with Bearli and Regan, and just all-around feeling good about things because they are getting done.
The one thing I have not done is put printed labels on and straightened out my files. Some day....
I miss my first husband, Jackie. I don't know about you but if I had some things to do over again I would have hung in there better and let other things go. Saying more about it doesn't bring him back but I do want him to know that I have Big Plans on seeing him again in Heaven. I hope God is in agreement with that plan! smile.
I am feeling melancholy so today is probably not a good day to write. I think about my son, Shawn, often. I wish him the best life. I do not dwell on things like I did, thank God, but I do still "wish." I pray a lot for Shawn.
I am learning how to get along without a car. I will get a bus pass, work with RIDE, pay gas to friends, walk!! I will get along. I am close to stores. The doctor will be a bit of a problem and my counselor but things will work out. I couldn't afford the car insurance at all.
I think I have rambled on enough to satisfy the blogspot gods and will close with Blessings for All and (to all a good night?? noooo) hope your days are going as they are supposed to go.

Monday, June 22, 2009

Turning Circle Prayer Shawl Pattern


I FINALLY FINISHED WRITING DOWN THE PATTERN for the Turning Circle Prayer Shawl. I had to make a second one so I could remember what I did and the finish on the 2nd one is different. I couldn't remember what I did on the first one and I don't have it anymore.
If anyone tries this pattern and takes a picture, please let me know if you find any errors or have any comments. I welcome all comments.
See picture of this Shawl at http://www.ravelry.com/ under EmmaLemmon47@msn.com

Materials: Leftover Worsted Weight Yarn. I don't know the exact amount. I just worked until the shawl was the size I wanted it. (Smaller: Baby version; Larger: Lapghan or Shawl) I did use some "fluffy" stuff hanging around to make it different.
Size Hooks: 'K', 'L', and you may need an 'M' or even an 'N'.

NOTES: 1) Ch3 at the beginning of each row LOOSELY. 2) Gauge is not important as you can adapt the pattern to make larger or smaller. 3) At various times, lay the shawl down on the floor or a table to check to be sure that it is lying flat. If yours is NOT lying flat, go up one size hook OR ch more between rounds OR place 3 dc in chain space instead of 2. 4) This shawl requires LOOSE work. If you tend to crochet tight, don't be afraid to use a Hook one or two sizes larger.

Ch 4, join into a circle with a slst.

Row 1: Ch 3 (counts as 1st dc now and throughout). Dc in ring, ch2, *2dc in ring, ch 2* around until you have 6 2-dc sets with ch2 in between. Slst in top of Ch 3.

Row 2: Ch 3; 2 dc in next dc, ch 2, *dc in next dc, 2 dc in next dc, ch 2" around. Slst.
(6 3-dc groups with 2 ch bet)

Row 3: Ch 3; *dc in ea dc to last dc of group, 2 dc in last dc, ch 3 between groups* around. Slst.
(six 4-dc groups with ch 3 bet)

Row 4: Ch 3; dc in ea dc to end of group, 3 dc in last dc, ch 3 bet groups.
(six 6-dc groups with ch 3 bet)

Row 5: Ch 3; *dc in ea dc to end, 2 dc in last dc, Ch 4 bet groups. Slst
(Six 7-dc groups with ch 4 bet)

Row 6: Ch 3 (LOOSELY!!); *dc in each dc to end of group, 2 dc in ch 4 space, Ch 4* around. Slst. (Six 9-dc groups with ch 4 bet)

Row 7: Rep Row 6, placing Ch 5 between groups. Slst
(Six 11-dc groups with ch 5 bet)

Row 8: Change to Size 'L' hook. Ch 3; *dc in ea dc to end of group, 2 dc in ch space, ch 5* around. Slst. (six 13-dc groups with ch 5 bet)

Row 9: Ch 3 (LOOSELY); *dc in ea dc, place 2 dc in ch space, Ch 5*. Slst.
(Six 15-dc groups with ch 5 bet)

Row 10: Slst into next dc, ch 3; *dc in ea dc to end of group, 3 dc in ch sp, Ch 6* around. Slst. (six 17-dc groups with ch 6 bet ea group)

Row 11: Sl st in next st, ch 3; dc in ea dc to end of group, 2 dc in ch sp, ch 6, *skip 1st dc, dc in ea dc to end of group, 2 dc in ch sp, ch 6* around. Sl st
(six 18-dc groups wtih ch 6 bet)

Row 12: Rep Row 11. (six 19-dc groups with ch 6 bet)

Row 13: Rep Row 11, placing ch 7 between groups. (six 20-dc groups with ch 7 bet)

Row 14: Sl st in next st, ch 3; dc in ea dc to end of group, 2 dc in ch sp, ch 7, *skip 1st dc, dc in ea dc to end of group, 2 dc in ch sp, ch 7* around. Slst. (six 21-dc groups with ch 7 bet)

Row 15: Rep Row 14. (Six 22-dc groups with ch 7 bet)

Row 16: Sl st in next st, ch 3; *dc in ea dc to end of group, 2 dc in ch sp, ch 8* around. Sl st.
(six 23-dc groups, ch 8 bet)
NOTE: Don't forget to lay shawl/lapghan down to check to see if it is lying flat. :-o

Row 17: Rep Row 16 with ch 8 bet groups. (six 24-dc groups, ch 9 bet)

Row 18: Rep Row 17. (six 25-dc groups, ch 9 bet)

Row 19: Sl st in next st, ch 3; *dc in ea dc to end of group, 3 dc in ch sp, ch 9* around. Slst
(27-dc groups, ch 9 bet)

Row 20: Rep Row 17 as written. (six 28-dc groups, ch 9 bet)

Row 21: Rep pattern with ch 10 between groups. (six 29-dc groups, 10 ch bet)

Row 22: Rep pattern with 3dc in ch sp and 10 ch bet groups. Sl st.
(six 31-dc groups, 10 ch bet)

Row 23: Ch 3, dc in ea dc and ch st around, Increasing one dc every 15st by placing 2 dc in the 15th st. Sl st to join. (NOTE: If need be, you can increase more to get work to lie flat.)

Row 24: Ch 3, dc in next 3 dc, 5 dc in next dc, *skip 2 dc, sc in next sc, ch 2; dc in ea of next 4 dc, 5 dc in next dc* around. You may need to "fudge" to fit the pattern at the end as I didn't count stitches. Sl st in beg ch. Fasten Off.

I hope you like this pattern. The idea came from looking at old doilies on a vintage site.
EmmaLemmon47